Why A Sample Tray Decides More Than A Quotation
A quotation tells you what a supplier wants to charge. A sample tray tells you what a supplier can actually produce. Buyers who invert that order — price first, product later — spend the rest of the relationship discovering what they did not check.
The reason is that lash trays are hard to describe and easy to hold. Two trays described as 8D, 0.07, C curl, mixed length can differ in base width, fan spread, strip tension, fibre finish and how the fan releases on pickup. None of those differences appear in a specification line, and all of them appear on the first set your artist builds. A sample is the only step where you compare the product itself rather than a description of it.
A sample also tests the supplier's process, not only the product. How a request is handled, whether the specification you asked for is the one that arrives, and whether the tray matches what was discussed, are all signals about how a repeat order will run.
What A Sample Kit Contains
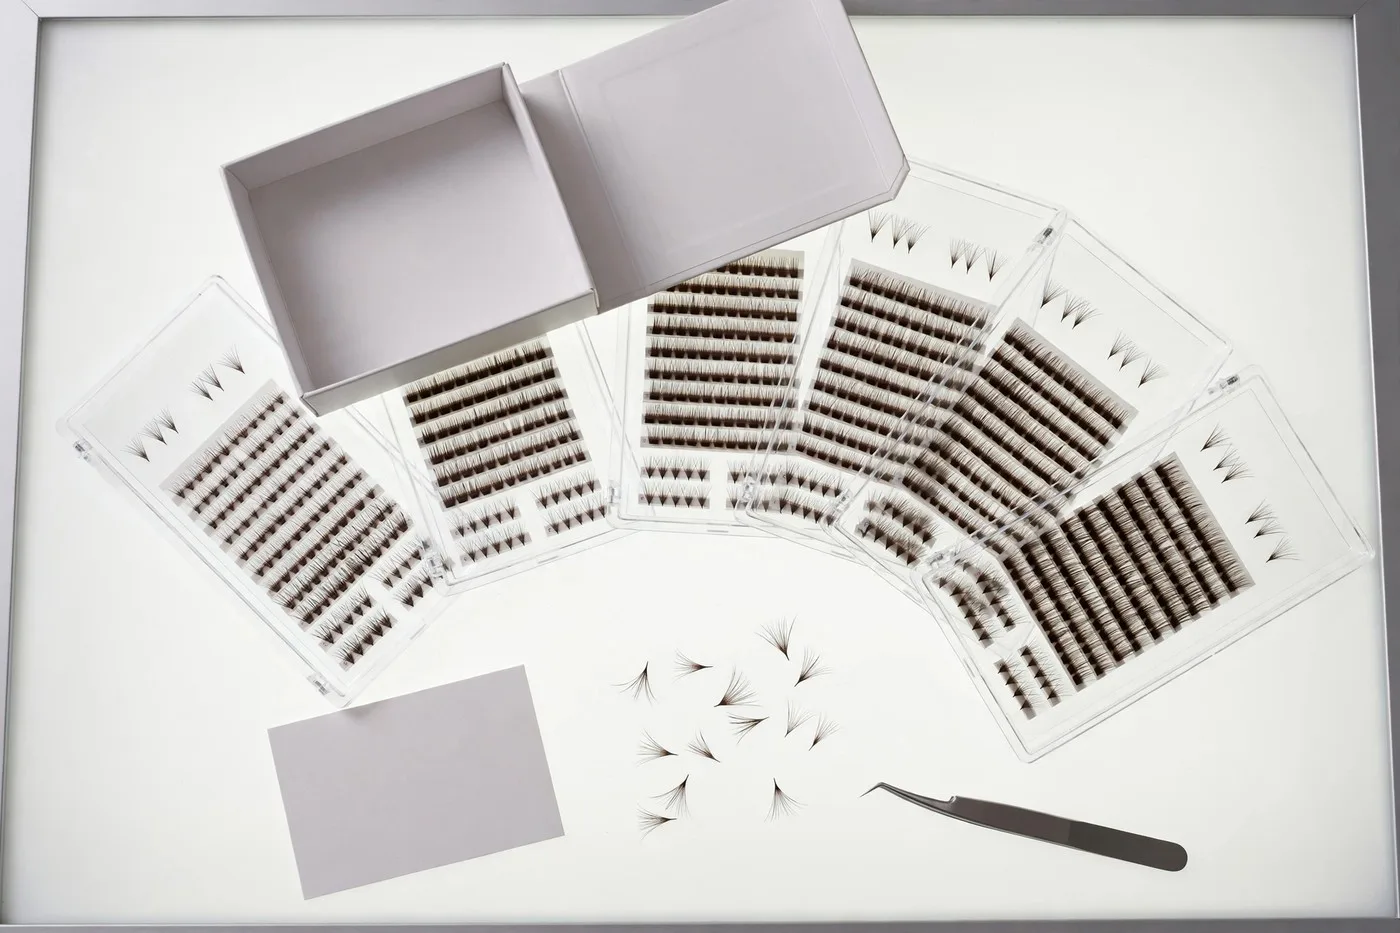
A kit is built around the specification you shortlisted rather than around a fixed box. It carries representative trays of the densities you are considering, so you can compare base shape, fan spread, curl and pickup feel side by side. Where a private label or packaging decision is in play, the kit also carries packaging samples, because product and presentation are judged together by your customers.
The point of sending more than one tray is comparison. A single tray tells you whether a fan is acceptable. Two or three trays of different densities, stems or curls tell you which specification fits your market, which is the decision you actually have to make.
If your curl, length mix or packaging is not final, say so when you request the kit. A kit built around a provisional brief is more useful than a kit built around a specification you invented to fill a field.
Who The Kit Is For
Sample kits are for buyers with a real sourcing plan: salons adding a line, lash artists standardising their stock, lash brands building a private label range, distributors assessing a supply source, and academies specifying what their students will train on.
The qualification is not a formality. A kit that travels to a buyer with no market, no volume estimate and no product direction cannot be built to test anything, and it wastes the one advantage a sample has: it is specific. Telling us your market, your customer type and the quantity you are considering is what turns a kit into a shortlist.
Samples are supplied free of charge. The buyer covers express shipping, which keeps sample requests focused on buyers who intend to order.
What Each Buyer Type Should Test First
**Salons** should test the tray they will reorder most: one density, one stem, applied across a full week of sets. The question is not whether the fan is beautiful but whether the tray holds up at working speed and whether the count matches the cost per set the salon has priced.
**Lash artists** should test the specification they cannot substitute. Pick the density and curl clients request most, then compare two stems on the same density. Artists notice base behaviour faster than anyone else, and their verdict is what decides whether a specification survives.
**Brands** should test the tray and the packaging together. A brand sells the pair, so a tray that is right in a bag and wrong in a box is not right. Where a private label range is planned, the sample should carry the packaging direction even if the artwork is still provisional.
**Distributors** should test consistency rather than preference. Take the same specification twice, compare the two trays, and check whether base, spread, curl and count hold. A distributor's risk is drift across volume, not one poor tray.
**Academies** should test durability under training conditions, where a tray is handled by many students rather than one artist. Pickup behaviour and count matter more than finish, because a tray that sheds fans during practice will not survive a term.
How The Sample Process Runs
The process runs in four steps. You request: market, product interest and quantity. We confirm the products and the sample route for your case. The kit ships by express, with shipping quoted separately. You test, approve the specification, and move to wholesale or private label.
The confirmation step is where most of the value sits. A short conversation about density, stem and tray format before dispatch usually changes what goes into the kit, and it is cheaper to change a kit than to change a production order.
Testing is the step buyers rush. A tray that feels right in the hand has not yet been tested on an eye, across a full set, at the speed your artists actually work. Give the sample a real application before you approve it.
What To Check On The Tray
**Fan base.** Check that the base is clean and narrow, and that it holds its shape on pickup. A base that collapses on the tweezers will slow an artist down on every set, not once.
**Spread and curl.** Compare fan spread and curl consistency across the whole tray rather than across the first row. Curl that begins at different points along the fibre reads as uneven on a finished set even when the specified curl is correct.
**Fibre and diameter.** Compare thickness by eye against a light background, picking fans from different rows. Diameter is the variable most likely to change the weight of a set without changing the D label.
**Strip and pickup.** Test whether the fan releases cleanly from the strip. A tray that grips too hard costs application time; a tray that releases too easily loses fans during handling.
**Count and layout.** Confirm the fan count and row layout against the specification, because a tray that is short on count is a tray that changes your cost per set.
**Packaging fit.** Where packaging is part of the order, test the tray and box your customers will actually receive, not just the tray.
Reading A Tray Row By Row
A tray is filled in sequence, so rows carry information. Reading top and bottom rows separately shows whether a batch was assembled in one run or combined from more than one. Visible differences between rows — base width, spread, curl start — are worth raising before you approve.
Sample across rows rather than within one. Picking five fans from the same row tests one moment of production; picking one fan from each of five rows tests the batch.
Look for patterns, not incidents. One fibre sitting outside the bond is handling. A consistent pattern across many fans is a bonding setting, and it will repeat in every tray that follows.
Compare the tray in daylight and under the light your artists work in. Fibre finish, stray fibres and dust read differently under each, and a tray approved under one light can disappoint under the other.
Finally, apply the tray. A full set on a model or a mannequin head, at working speed, is the only test that combines base, spread, curl and pickup into the judgement your customers will make.
Comparing Two Suppliers On The Same Brief
The only fair comparison is a brief both suppliers receive in identical terms: same density, same diameter, same curl, same length mix, same tray format, same declared count. Send that brief in writing and keep it, because a comparison run on two different briefs compares nothing.
Then compare like with like. Base width across ten to fifteen fans from each tray. Spread across rows. Where the curl begins along the fibre. Whether the fibre weight reads the same at the same declared diameter. Whether the declared count is the count you can actually pick.
Compare the trays on the same day, in the same light, with the same artist. Human judgement drifts between sessions, and a comparison spread over a week measures the drift as much as the product.
Keep notes against each tray. A written record of what you saw is what lets you explain a decision to a partner, a trainer or your own team six months later.
What A Sample Cannot Tell You
A sample cannot tell you how a fan behaves after four weeks of wear, how a batch will hold up across a season, or whether a supplier's fifth order will match its first. Those are questions about process and about records, not about a tray in your hand.
A sample also cannot confirm material composition. Visual inspection shows consistency and finish; it does not identify what the fibre is made of. Treat what you can see as a filter that decides whether a sample is worth wearing, not as a substitute for wearing it.
What a sample can do is eliminate. A tray with unstable bases, uneven curl or inconsistent diameter will not become reliable at volume. Rejecting on evidence at the sample stage is the cheapest decision available to a buyer.
From Sample To Specification
Approval should end with a document, not a memory. The useful record captures density, diameter, curl, length mix, stem, tray format and pack count, plus the packaging version if packaging is part of the order. It identifies the approved sample as the physical reference.
That record does three jobs. It lets a reorder be placed without renegotiating the product. It gives quality control something to inspect against. And it makes a drift visible, because a tray that does not match the record can be described precisely rather than argued about.
Where a brand is building a private label line, the specification sheet and the packaging proof should carry the same version. A tray approved against one artwork and packed against another is a mismatch your customers will notice before you do.
After The Sample: Stock Or Custom
Once a specification is approved, the next decision is whether it comes from stock or from custom production. FanLash holds 56 stock specifications across seven densities (4D, 5D, 7D, 8D, 9D, 10D, 12D), four stem types and two tray formats. A specification that matches stock can move into production without a development round.
Custom production covers any density between 2D and 14D, plus diameter, length range, curl, stem and tray format set to your brief. A sample that is close to stock but not exactly right is the normal starting point for a custom specification.
Test the density you intend to sell. Weight and spread change with density, and a tray approved at one density is a reference for that density, not a template for the range.
Sample Kit FAQ
**What comes in a sample kit?** A selection of trays covering the specification you shortlisted, so you can compare base shape, fan spread, curl and pickup feel before ordering. Packaging samples are included where packaging is part of the project.
**Are samples free?** The sample trays are supplied free of charge. Shipping is quoted separately and depends on the destination.
**What should I check first?** The fan base, the spread across the tray, curl consistency and how the fan releases from the strip. Then apply the tray at working speed.
**How long does delivery take?** Shipping time depends on the destination and the courier service confirmed in the quotation.
**Can I request a specific density that is not in your stock list?** Yes. Stock covers 4D to 12D in seven steps; custom production covers any density between 2D and 14D.
**Can the kit include packaging?** Yes. Where a private label or packaging decision is in play, the kit can carry packaging samples so product and presentation are judged together.
Request Your Sample Kit
Send your market, your product interest and your estimated quantity. We reply with a sample route and the shipping quote for your destination.
Four details make the kit specific: the densities you are considering, the stem and tray format your artists use, the market you sell into, and whether packaging is part of the decision. If any of those are unsettled, say so — a kit built around an open brief is still useful.
Request Sample Kit